
Cascading Dropdowns with WCF RESTful webservices, LINQ to SQL, JSON and jQuery
For anyone that has ever built an automotive dealer website, you would have come across the need to implement dropdown lists that link to each other, or as I call them, Cascading Dropdowns. When doing a search for a used car, the user typically wants to narrow down the search based on the make and model and specification of the car.
Before AJAX frameworks became popular and cross browser compatible, the only real choice was to output a JavaScript array. This solution was fine for a small amount of data, but the implementation tended to be messy and didn’t fit well with a well defined architecture. This situation got a little better when the webservice.htc was released, but again this was IE only.
So, how would we implement this common scenario with today’s technology?
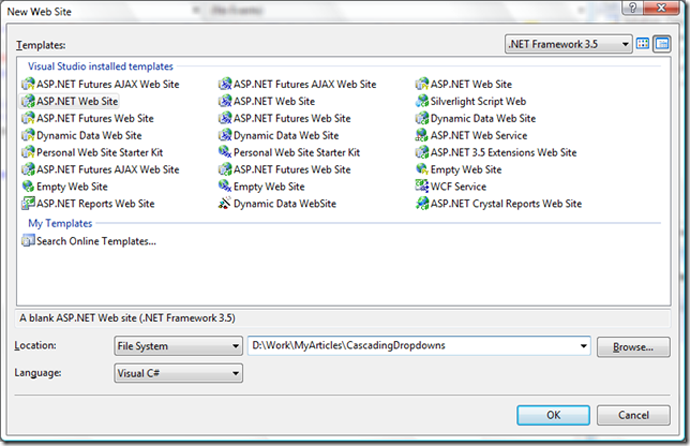
First of all create a new ASP.NET website and choose your preferred language, I’m using C#.
Next create a new SQL database. For this demo I’ve created a SQL Express 2005 DB and called it “VehicleDatabase”.
Next create three tables, Makes, Models and Derivatives. All ID’s are of type INT and the Name fields are of type VARCHAR.
Next we create the stored procedures to query the tables. Create the following three stored procedures:
1: create proc dbo.GetMakes
2:
3: as
4:
5: set nocount on
6:
7: select MakeId, MakeName from Makes
8:
9: return
1: create proc dbo.GetModels
2:
3: @MakeId int = -1
4: as
5:
6: set nocount on
7:
8: select ModelId, ModelName from Models where MakeId = case when @MakeId = -1 then MakeId else @MakeId end
9:
10: return
1: create proc dbo.GetDerivatives
2:
3: @MakeId int = -1,
4: @ModelId int = -1
5: as
6:
7: set nocount on
8:
9: select DerivativeId, DerivativeName from Derivatives d
10: inner join Models m on m.ModelId = d.ModelId
11: where (d.ModelId = case when @ModelId = -1 then d.ModelId else @ModelId end)
12: and (m.MakeId = case when @MakeId = -1 then m.MakeId else @MakeId end)
13:
14: return
These stored procedures simply just return the required fields, the only thing to note is on the GetModels and GetDerivatives SP’s, the parameters have a default value of -1. We also do an inline case statement to check for that default value and if matched, return all of the records. This allows us to populate the dropdowns with all available data before we perform the filter.
Add some test data to the tables.
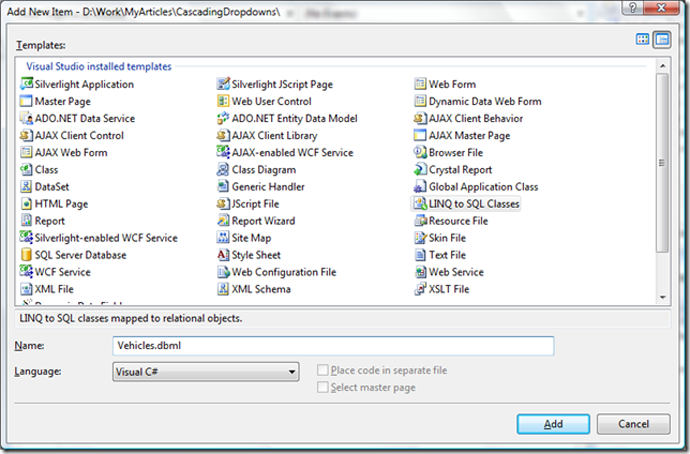
Now that the database is sorted we need to create our entities. For this example, we don’t really need the entities as we are using stored procs that return a generic dictionaries but it gives you a flavour on how it can fit into you existing architecture. Add a new item to our website and choose the LINQ to SQL Classes.
Now drag you tables from the Server Explorer onto the left hand side of the designer.
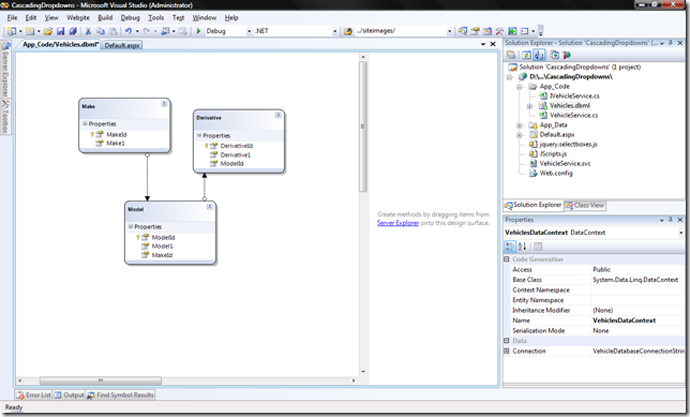
And drag the stored procs onto the right hand side of the designer. Alternatively we could have dropped the stored procs onto their corresponding table. This would tell the designer that the return type of SP would be of that table/entity. So for example, if we were to drop the "GetMakes" SP onto the “Makes” table we would be telling the designer that the “GetMakes” SP returns a set of Make objects.
I have decided to return a Generic Dictionary<string, string> instead of the entities as I only want to return a key and value for each make, model or derivative.
As we are exposing this data via WCF we need to change the Serialization Mode from “None” to “Unidirectional”. This can be achieved through the properties of the LINQ to SQL Classes.


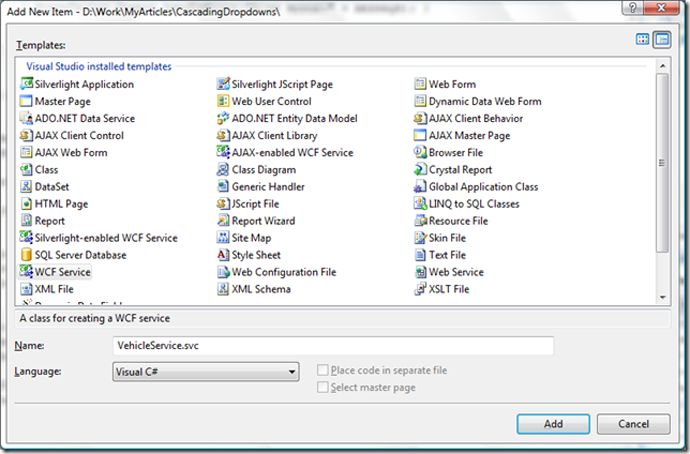
Right, now we have our data, we need to expose it through WCF webservices. Add a new item to our website and choose the WCF service item. I’ve called my service “VehicleService.svc”. Click yes when it asks you if you want to place it into the App_Code folder.
Once we have added the service, we need to alter the web.config. When adding a service to the project, Visual Studio changes the web.config and puts some default settings in for us. Copy and paste the XML below and replace the serviceModel section of the web.config. The main points here to notice is the endpoint binding is set to webHttpBinding rather than the SOAP default and the behaviour has httpGetEnabled = true.
1: <system.serviceModel>
2: <services>
3: <service behaviorConfiguration="VehicleServiceBehavior" name="VehicleService">
4: <endpoint binding="webHttpBinding" contract="IVehicleService" behaviorConfiguration="WebHttpBehavior">
5: </endpoint>
6: </service>
7: </services>
8: <behaviors>
9: <serviceBehaviors>
10: <behavior name="VehicleServiceBehavior">
11: <serviceMetadata httpGetEnabled="true"/>
12: <serviceDebug includeExceptionDetailInFaults="true"/>
13: </behavior>
14: </serviceBehaviors>
15: <endpointBehaviors>
16: <behavior name="WebHttpBehavior">
17: <webHttp/>
18: </behavior>
19: </endpointBehaviors>
20: </behaviors>
21: </system.serviceModel>
The first service we’ll create is to populate the makes dropdown. With WCF we first need to create a contract for the service. Open up the interface IVehicleService and type or copy in the following code.
1: [ServiceContract]
2: public interface IVehicleService
3: {
4: [OperationContract]
5: [WebInvoke(Method = "GET", BodyStyle = WebMessageBodyStyle.Bare, ResponseFormat = WebMessageFormat.Json, UriTemplate = "GetMakes")]
6: Dictionary<string, string> GetMakes();
7: }
The things to notice about this code is the WebInvoke attribute. This is where all the work goes on. The first thing we set is the method, as we are wanting RESTful services, we will set this to GET. We could have also used the WebGet attribute here instead of the WebInvoke attribute. The next setting is the BodyStyle property and we set this to WebMessageBodyStyle.Bare. This removes the wrapper around the data. If we were exposes as POX (Plain Old XML) then it would remove the namespace declaration etc. but as we are using JSON, it removes a wrapper object.
We then set the ResponseFormat to WebMessageFormat.Json which exposes the data as JavaScript instead of the default XML. The last property we set is the UriTemplate. This property denotes the endpoint of our service, which uniquely identifies the method of the service.
As I mentioned earlier, the return type is of Dictionary<string, string> which allows us to expose just the data required.
Next we need to implement the interface we've just created. Open up the code behind for the service VehicleService.cs which is located in the App_Code folder. Create the following method.
1: public Dictionary<string, string> GetMakes()
2: {
3: Dictionary<string, string> makes = new Dictionary<string, string>();
4:
5: using (VehiclesDataContext vdc = new VehiclesDataContext())
6: {
7: makes = vdc.GetMakes().ToDictionary(m => m.MakeId.ToString(), m => m.MakeName);
8: }
9:
10: return makes;
11: }
The code above creates a generic dictionary and populates it with the results of the stroed proc. The thing to notice here is the use of Lambda expressions to specify the key and value fields for the toDictionary() extension method.
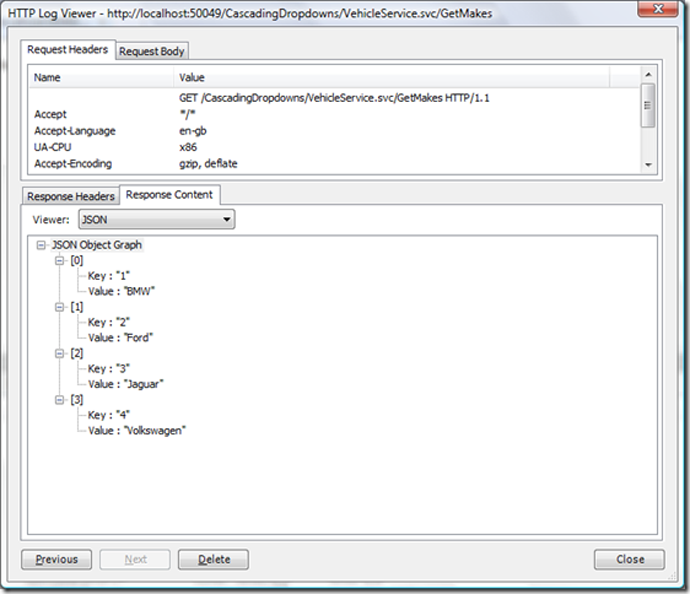
Now we can test the first service. Open a browser and navigate to the service endpoint.
My endpoint is http://localhost/VehicleService.svc/GetMakes
Depending on your browser (I’m using IE8 beta 1), you will either see some JavaScript on the screen or you’ll be asked to save a .js file. A nice little utility for Internet Explorer is Nikhil’s Web Development Helper Using this tool you can see the JSON results coming back from the service.
Now we have a working service, we can implement the other two services we require. Notice how we pass the parameters through to the services. The UriTemplate uses place holders that get replaced with the passed in params. The reason why we pass the MakeId and ModelId to the GetDerivatives is so that if only the Make dropdown is selected the derivatives dropdown is still filtered. Here is the interface implementation:
1: [OperationContract]
2: [WebInvoke(Method = "GET", BodyStyle = WebMessageBodyStyle.Bare, ResponseFormat = WebMessageFormat.Json, UriTemplate = "GetModels/{makeId}")]
3: Dictionary<string, string> GetModels(string makeId);
4:
5: [OperationContract]
6: [WebInvoke(Method = "GET", BodyStyle = WebMessageBodyStyle.Bare, ResponseFormat = WebMessageFormat.Json, UriTemplate = "GetDerivatives/{makeId}/{modelId}")]
7: Dictionary<string, string> GetDerivatives(string makeId, string modelId);
And the service implementation:
1: public Dictionary<string, string> GetModels(string make)
2: {
3: Dictionary<string, string> models = new Dictionary<string, string>();
4: int makeId;
5: int.TryParse(make, out makeId);
6:
7: using (VehiclesDataContext vdc = new VehiclesDataContext())
8: {
9: models = vdc.GetModels(makeId).ToDictionary(m => m.ModelId.ToString(), m => m.ModelName);
10: }
11:
12: return models;
13: }
14:
15: public Dictionary<string, string> GetDerivatives(string make, string model)
16: {
17: Dictionary<string, string> derivatives = new Dictionary<string, string>();
18: int makeId, modelId;
19: int.TryParse(make, out makeId);
20: int.TryParse(model, out modelId);
21:
22: using (VehiclesDataContext vdc = new VehiclesDataContext())
23: {
24: derivatives = vdc.GetDerivatives(makeId, modelId).ToDictionary(d => d.DerivativeId.ToString(), d => d.DerivativeName);
25: }
26:
27: return derivatives;
28: }
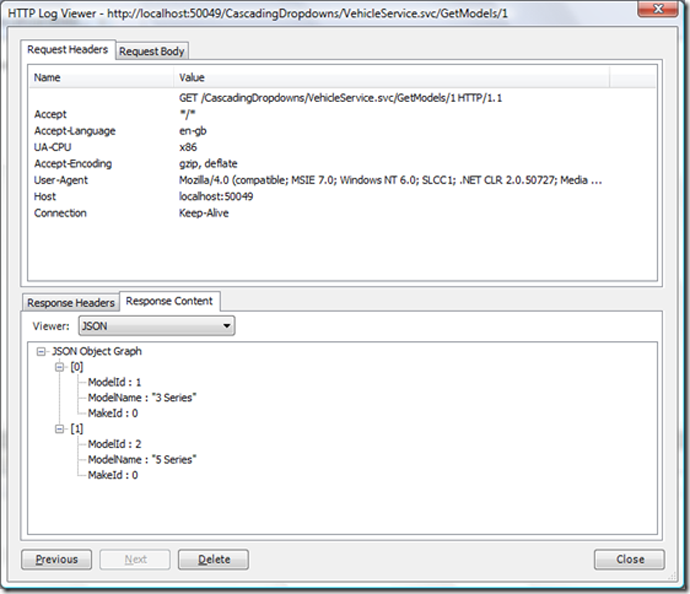
I we were to set our “GetModels” service method to return of type “Model” we would have sent over the “MakeId” with the data, but as we didn’t select it in our stored proc then they come through as zeros. This can be seen below. We test our services by navigating directly to them and passing in dummy parameters like so: http://localhost/CascadingDropdowns/VehicleService.svc/GetModels/1
Now we have all of our server side stuff done, we can move onto the client side jQuery.
First off, add a new item to our website and choose a JavaScript file, call it JScripts.js.
We next add the reference to the jQuery library, I’ve linked to the google hosted version which gives a couple of benefits.
- Due to restrictions on most browsers of only two http requests at one time, the file will be download asynchronously due to it being hosted on another domain to the website.
- If the user has already visited a site that has linked to the same file then they will have it in their cache.
Go to http://code.google.com/apis/ajaxlibs/documentation/index.html#jquery to find out more.
Then download a jQuery plugin that makes it easier to deal with select boxes. http://www.texotela.co.uk/code/jquery/select/
Please note that I’ve opted for jQuery over ASP.NET AJAX due to it being lightweight and in my opinion more elegant.
Link to the scripts in our Default.aspx page ensuring to keep the correct order.
1: <script type="text/javascript" src="http://ajax.googleapis.com/ajax/libs/jquery/1.2.6/jquery.min.js"></script>1:2: <script type="text/javascript" src="/Scripts/jquery.selectboxes.js">1: </script>2: <script type="text/javascript" src="/Scripts/JScripts.js"></script>
Next add the three dropdowns to the page. These can be normal html elements as we don't need any server side involvement.
1: <select id="Makes"></select>
2: <select id="Models"></select>
3: <select id="Derivatives"></select>
Now for the JavaScript. Its good practice to namespace your JavaScript so not to override other functions and objects, which is easy to do. I first check and then add a namespace to our JScript.js file. I then create a couple of helper functions to handle errors and make the AJAX call to the services.
1: // Check to see if namespace already exists and create
2: var SteveTaylor = window.SteveTaylor || {};
3:
4: // Some helper methods
5: SteveTaylor.Common = function(){
6: return{
7: // Handle errors here
8: handleError: function(msg){
9: alert(msg);
10: },
11: // Main call service helper
12: callService: function(url, method, callback)
13: {
14: $.ajax({
15: url: url,
16: type: method,
17: contentType: "application/json",
18: dataType: "json",
19: success: callback,
20: error: function(xhr, message, ex)
21: { SteveTaylor.Common.handleError("Ajax error:" + message); }
22: });
23: }
24: }
25: }();
We then need to create an init function that hooks up the events and binds once the page is loaded. I start off by creating another singleton object prefixed with the namespace of SteveTaylor. The first two lines in the init function binds an onchange event to the makes and models select boxes. The third line calls another function that populates the makes dropdown. As the makes and models dropdowns have an onchange event, once the makes are populated the models and derivatives automatically follow suit.
1: // This object populates our dropdowns
2: SteveTaylor.VehicleSearch = function(){
3: return{
4:
5: init: function(resultsPage){
6: // Bind events
7: $("#Makes").bind("change", SteveTaylor.VehicleSearch.getModels);
8: $("#Models").bind("change", SteveTaylor.VehicleSearch.getDerivatives);
9:
10: // Initialise makes dropdown
11: SteveTaylor.VehicleSearch.getMakes();
12: }
13: }
14: }();
Next add the three functions that will populate the select boxes. Here is the full vehicle search object:
1: // This object populates our dropdowns
2: SteveTaylor.VehicleSearch = function(){
3: return{
4: getMakes: function(){
5: $("#Makes").removeOption(/./).addOption("-1", "Loading...");
6:
7: SteveTaylor.Common.callService("VehicleService.svc/GetMakes", "GET", function(result){
8:
9: for(var i=0; i < result.length; i++)
10: $("#Makes").addOption(result[i].Key, result[i].Value);
11:
12: $("#Makes").addOption("-1", "Any Make").trigger("change");
13: });
14: },
15: getModels: function(){
16: $("#Models").removeOption(/./).addOption("-1", "Loading...");
17:
18: SteveTaylor.Common.callService("VehicleService.svc/GetModels/" + $("#Makes").val(), "GET", function(result){
19: for(var i=0; i < result.length; i++)
20: $("#Models").addOption(result[i].Key, result[i].Value);
21:
22: $("#Models").addOption("-1", "Any Model").trigger("change");
23: });
24: },
25: getDerivatives: function(){
26: $("#Derivatives").removeOption(/./).addOption("-1", "Loading...");
27:
28: SteveTaylor.Common.callService("VehicleService.svc/GetDerivatives/" + $("#Makes").val() + "/" + $("#Models").val(), "GET",
29: function(result){
30: for(var i=0; i < result.length; i++)
31: $("#Derivatives").addOption(result[i].Key, result[i].Value);
32:
33: $("#Derivatives").addOption("-1", "Any Derivative").trigger("change");
34: });
35: },
36: init: function(resultsPage){
37: // Bind events
38: $("#Makes").bind("change", SteveTaylor.VehicleSearch.getModels);
39: $("#Models").bind("change", SteveTaylor.VehicleSearch.getDerivatives);
40:
41: // Initialise makes dropdown
42: SteveTaylor.VehicleSearch.getMakes();
43: }
44: }
45: }();
You will notice from the above code that the three functions are very similar and could have even been abstracted out a bit more. Lets analyse the getMakes function first.
The first line uses the removeOption functions of the plugin and passes in a regex to remove all items in the dropdown. This is necessary due the caching that the plugin implements. Then utilising jQuery’s chaining, we add a temporary option that shows the user that data is loading. We then call the service and pass in the URI, the method and a callback function. Note we pass in an anonymous function that receives the results and loops through the key value pairs and adds them to the dropdown. We then add the default “Any Make” option that has the -1 value to the list.
The other two functions are almost identical, the only difference being we add the values of the other dropdowns to the URI to pass them into the service.
The last thing we do is call the init function once the DOM is ready.
1: $(document).ready(SteveTaylor.VehicleSearch.init);
Download Solution - CascadingDropdowns.zip
Hope it all makes sense and let me know how you get on.